Gallery
Here you will find an assorted gallery of images taken throughout the course of the project, with some brief explainations.
 Image of our original ideation process. Note the groups of sticky notes that came together to define our project.
 Image of our layout board, describing our timeline and our team goals for each sprint.
 Early image of our system layout plan. From this sketch we decided on the layout of system architecture. Notice that we did alter many things from this point in the process. For example, we pivoted away from using AprilTags soon after this picture was taken.
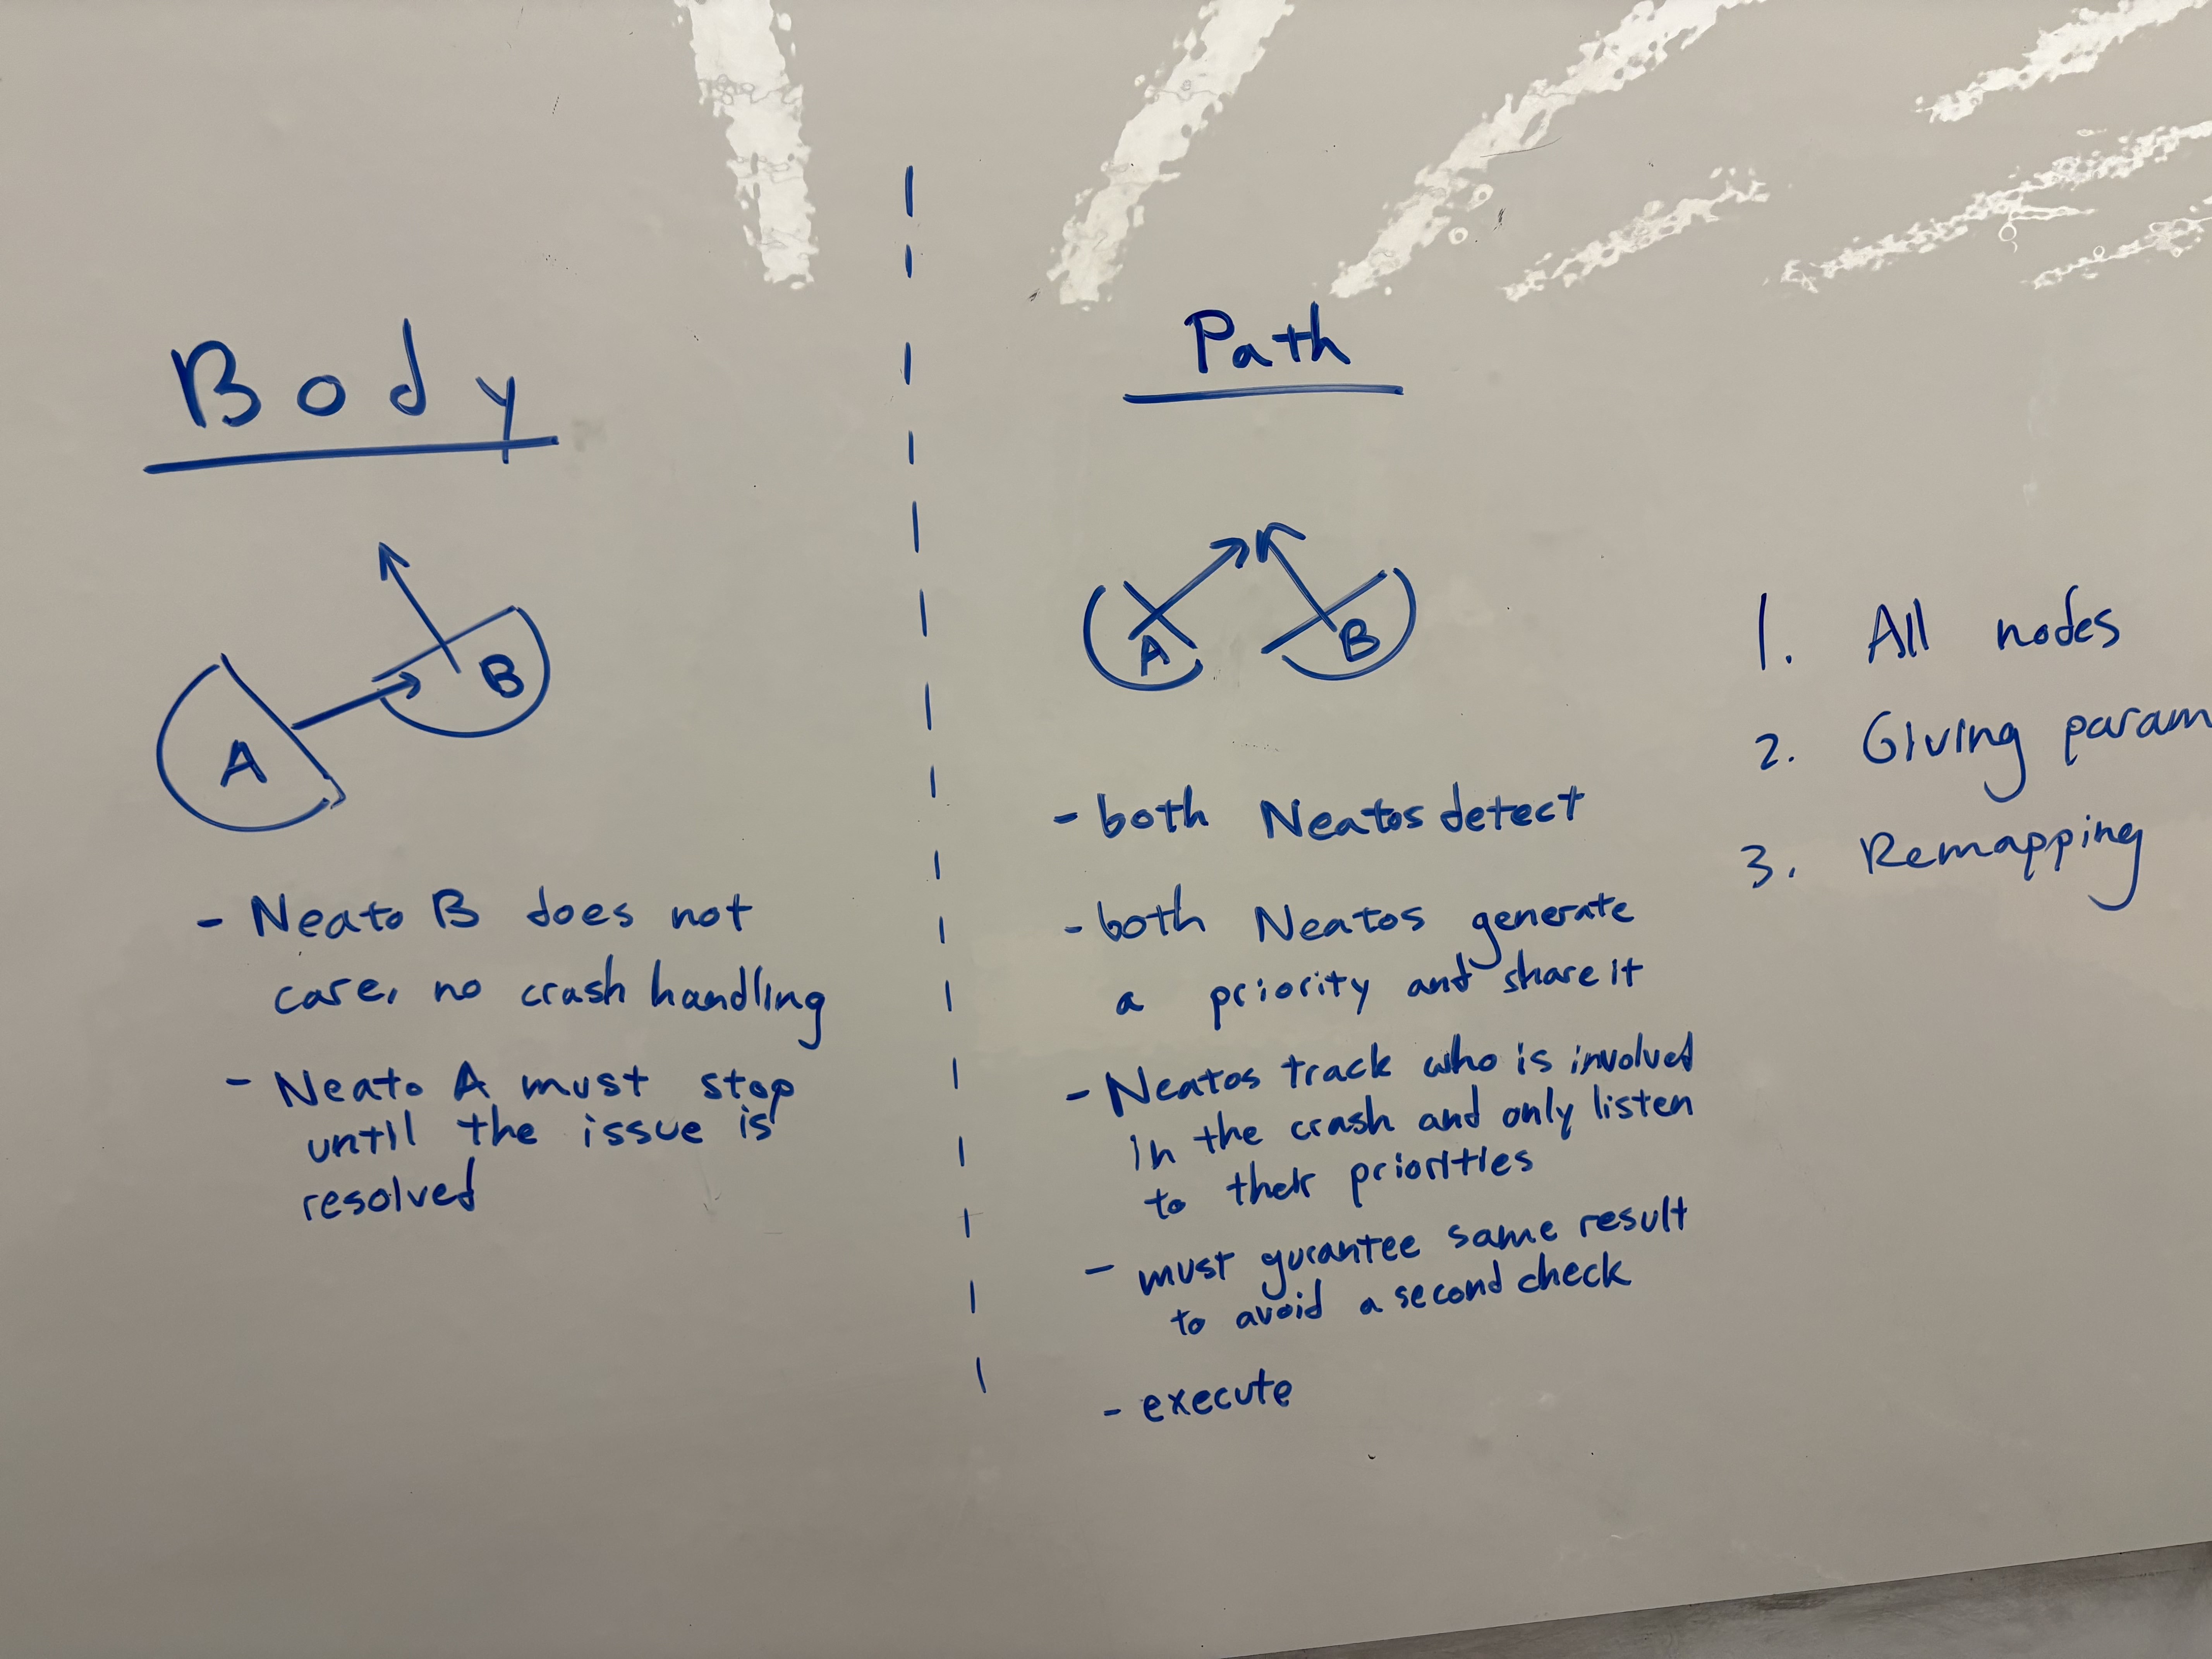 Here is an image of how we started planning our crash handling node. We identified the two scenarios of physical crash and path intersection early on.
 Here is a screenshot of the terminal output from when the visual odometry started working.
Above is a video of when we were testing a single robot path planning… As you can see it didn’t turn out too well.
Here you can see the same objective as above, but this time the path planning worked!
We added some obstacles (the red dots) and got that working.
Once we started working with multiple robots, it gave us a lot of trouble.
Here is when we finally got the whole system working.